Tuesday, December 29, 2015

The table definition is invalid and can not be validated Error in Nav 2013 R2

In Microsoft Dynamics NAV 2013R2 when you try to add fields or update anything then you would encounter this Error(The table definition is invalid and can not be validated )..


As you can see Nav won't accept any changes to table and hence cannot be validated. To overcome this there is a simple Solution Many of you may already Know this...

There is a Option in TOOLS---->Options-->Prevent Data Loss From Table Changes. As this is Set to Yes you were not able to change the Fields/ change structure of table.

So Set Prevent Data Loss From Table Changes To NO.


You have to do this every time you change your table So Microsoft released a HotFix to Eliminate this problem..Click here to Redirect to HotFix.


Thursday, December 24, 2015

Time Conversion From Fractions

As One of Our Author Interested to Post this Time Conversion Function So that it would be Helpful. On Behalf of him (U. Mahesh Sir) , I would like to post...

So Let's Get into Situation if you need a small tool like Converting Time Fraction from NAV standards Like 1.98 hours to 1 hour and 58 mins...

You might want to represent as 1:58 So to achieve that..

i would like to implement a CodeUnit  .Let's Declare a CodeUnit Time Calculator ..

Lets Create a Function Say ConvToHour and property of function Local to NO like Below...

Now Declare a parameter for Function as we would use fraction decimal in convertion...like below

select Function and Click Locals and define a Parameter of datatype Decimal...
Name               Datatype
TimeInDec    Decimal....


Next we want to return a text like 1:58  in my example to calling place. So  Set return Type to TEXT..


You can also return return as Time Datatype....

So now we should declare a Local String Variable which we wanted to send back...after Modifications Of Course..


NOW getting into business declare Globals (you may also use locals but i used globals formally)..

Name                DataType
hrs                          Integer
min                          Integer
secs                           Integer
frac_req_Min           Decimal
frac_req_secs         Decimal
Time1                 Time


Now write the Logic  for converting...

Not Using any Alien Tech functions Just Using a ROUND Function ,I hope you may came across..
For Begginers Sample: ROUND(11.9) = 11


OnRun()
MESSAGE(ConvToHours(1.98));

In Above I'm Calling the Function which Would return text so directly Displaying that in Message Function...


hrs := ROUND(TimeinDec,1,'<');

//IN Above statement we would get hours...

//Getting 0.98 and Converting 0.98 fraction into minutes i.e 0.98 * 60 = 58.80
frac_req_Min := TimeinDec - hrs;
min := ROUND(60 * frac_req_Min,1,'<');

//Getting 0.80 and Converting 0.80 fraction into minutes i.e 0.80 * 60 = 48 sec

frac_req_secs := (60 * frac_req_Min) - min;
secs := ROUND(60 * frac_req_secs,1,'<');

//Converting Integer to String as we cant directly send 1:58 isn't it

Str := FORMAT(hrs);

//converting Minutes to string 

IF min > 9 THEN
Str := Str + ':' + FORMAT(min)
ELSE
  Str := Str + ':0' + FORMAT(min);


//converting Secs to String

IF secs > 9 THEN
Str := Str + ':' + FORMAT(secs)
ELSE
  Str := Str + ':0' + FORMAT(secs);

//Just To Test
//You Could convert it to Time if needed 
EVALUATE(Time1,Str);
MESSAGE('%1',Time1);

//This is to return from where you calling....Hope you understand...
EXIT(Str);


Screen shot of Code...

OutPut


Let me Know if you have any Queries....
Thank You..

Wednesday, December 23, 2015

Drill Down Option in Request Page For Beginners...

This  post is as per request of Ramesh post..

This is Small Post But Very Commonly Required.....

First and Fore most is to Declare Global variables for which fields we want to add Request Page fields ..

Let's get into situation in my case say i want to show Drill down to select a Customer No.


First define a Variable of same datatype as  you may use in SETFILTER OR SETRANGE..

Just like below....

So in  Customer---ONPREDATAITEM()
 you can define SETFILTER(Customer."No.",'%1',Custfilter);

Now getting to Request Page...

Open Request Page And Give some Name To Container  and select If you want Group /Field Then

SourceExp Open Globals by selecting Assist Edit Button And Select Your Defined Variable....


Now Select Your Field And Open Properties Window By Shift + F4..

And change Table Relation Select the respective  Table And Field.... So it would take it as INPUT....


So That's It Done Now Save , Compile  And RUN......


Friday, December 18, 2015

Convert Time to Decimal / Interger As per Our Requirements


This Post is as per Request of my Friend Shyam Pandey's .. Post

So our primary Aim is to get hours from Time Datatype Variable So that we can use it*.

Let's adapt to situation by assigning variables..
Name                   Datatype
1. GivenTime      Time
2.TimeInText      Text
3.HourTime          Integer
4.Am_Pm            Text


Let Time Be 12AM i.e

GivenTime := 00T;  //i.e 12:00:00 AM

Now Copy the Hours and convert into integer
TimeInText := FORMAT(GivenTime);
 EVALUATE(HourTime,COPYSTR(TimeInText,1,2));

Now copy for AM/PM

Am_Pm := COPYSTR(TimeInText,10,2);


Now you got time in integers and AM/Pm in text you can test for  whatever conditions
you required..

IF (HourTime = 12) AND (Am_PM = 'AM') THEN
HourTime := 00;//but you will get only 0

So If you want to Show only 00 as Out put  take another text variable text1:= '00';

NOTE : In Case If you need to it somewhere to convert also there wont be any problem;

Saying above statement that you convert again easily
 Example:
1. Integer

Time := 0T + HourTime;

2.Text

Evaluate(Time,Text);

So there won't be any problems.........

Thank you,


Thursday, December 17, 2015

Dynamically hide/display fields in Report request page - NAV 2013 OR NEWER Part II

2.. Process to Dynamically hide/display fields in Report request page
As Discussed in earlier Post. We can achieve request page Fields using / Setting Visibility of respective fields  . So in this post i would use a  INPUT BOX.
Below is example from Saurav Dhyani sir, i used it in my case.
How we used to use it in NAV 2009 Classic or Before -

Below is the code that we used to write for using InputBox to accepts inputs from User. In this case i will store the results in CustomerNo Variable as shown.


Here is what we have when i tried to run this codeunit.


Let's Move this codeunit to NAV 2013 R2 and try to Run the Same. 

It did compiled as shown below -


But Let's see what happens when i tried to run the same. Oh this ends up with an error message saying - "The Input Method is Obsolete".

How we can use it in NAV 2013 and Later?

DOTNET have the Same Funtion with a minor Change which can be used as Input Box.

I will Change the Paramter as Below -

--------------------OLD----------------
Name   = Window
DataType  = Dialog
SubType   = ''
--------------------OLD----------------

--------------------NEW-----------------
Name    = Window
DataType = DOTNET
SubType  = Microsoft.VisualBasic.Interaction.'Microsoft.VisualBasic, Version=10.0.0.0, Culture=neutral, PublicKeyToken=b03f5f7f11d50a3a'
------------------NEW--------------------

* Make Sure You change the Property RunOnClient = TRUE for the Variable Window, 


coming  to our example we need a boolean variable to to set the fields  Visibility , So i Prompted window to select true/ false . Like Below...


Then Set that Bool value , BUT the thing is that we should add code in onOpen page ()Trigger


One more thing is that we should/can only write above code  in ONINIT() or OnopenPAge 

because these are only area that i hav seen effect after that page is already instantiated so there would be no effect.


The Flaw in this process is that once you got request page there is no use of boolean variable as if you change it to false i mean uncheck BOX  there would be no use ...

So go for 1st Process , if you need  you can use 2 nd process

Thank you ...........

Dynamically hide/display fields in Report request page - NAV 2013 OR NEWER Part I

As EveryOne know for getting Dynamically hide /Display fields in Request Page of report we need

1. Boolean Variable
(And  Field  that we want dynamically let it be of TEXT variable for this Example .) like below


I need to implement like when i click boolean button to true (check box) then only a text field should appear like below.


THEN BOOM

so We have declare the two variables as shown in first pic and don't forget to set their properties to


INCLUDE to DATASET to YES.....

Now SET the Visibility of  Text variable to Boolean Variable . Like Below ...


Now Save the report and Run......................................................................................


Yes , you wont get any result i mean dynamic fields as this above process has got result for 2009 NAV ..I'm NOT the Big Guy to discuss about why?


So there are two process for achieving it

1..Make a Group and set the group Visibility property to Boolean variable as Below


Now Save THE REPORT AND RUN IT WORKS LIKE A CHARM..


In the Next post i will use a Dotnet variable to get Boolean so NO group visibility......


Plz comment OR  like it
Thank you ,

Monday, December 7, 2015

Export To Excel using Automation Variables / Create Excel in reports using Automation Variables in NAV

There are many ways to create a Excel from Report in the Microsoft Dynamics NAV 2015.

--> Using Excel Buffer table
--> Using Automation variable

Using of  Automation variables is faster way to create Excel in NAV 2015.

Required Global  variables:
Name DataType Subtype Length
xlapp Automation 'Microsoft Excel 15.0 Object Library'.Application
xlbook Automation 'Microsoft Excel 15.0 Object Library'.Workbook
xlsheet Automation 'Microsoft Excel 15.0 Object Library'.Worksheet

xlRange Automation 'Microsoft Excel 15.0 Object Library'.Range
j                  text                


ONPreReport Trigger()
  CREATE(xlapp,TRUE,TRUE);
  xlbook.Visible(TRUE);
  xlbook:=Excel.Workbooks.Add(-4167);
xlsheet:=Excel.ActiveSheet;

  xlsheet.Name := 'Sheet Name';
j='1';
xlsheet.Range('B'+'1').Value :='Name';

xlsheet.Range('A'+'1').Value :=  'Cust No.';
Above Code is common for creating a Excel To insert any values i.e from tables we have 
to write code on OnAfterGetRecord Trigger. As per our customizations

OnAfterGetRecord Trigger()
Simple code just comprising 2 field lets say customer NO and Name.
j := INCSTR(j);
xlsheet.Range('A'+j).Value := Customer."No.";

xlsheet.Range('B'+j).Value := Customer.Name;
----------x---------------x------------------x----------------x


For Customizing Excel add below code as per your requirement
Merge Column in Excel

Sheet.Range('A'+'1' + ':' + 'D'+'1').Merge;
Sheet.Range('A'+'1').Value :=  ' Excel_test';

Fill Colour in Excel Column

Sheet.Range('A'+'1').Interior.Color := 888888;


Font Bold

  Sheet.Range('A'+'1').Font.Bold := TRUE;


Font Italic  Sheet.Range('A'+'1').Font.Italic := TRUE;


Font Size  Sheet.Range('A'+'1').Font.Size := 10;

Border Cell  Sheet.Range('A'+'1').Borders.LineStyle := 0;

 SavaAs Excel
  Sheet.SaveAs('Excel_test.xlsx');

Password Protect Sheet Sheet.Protect('NAV');
--------------------------------------------XXX---------------------------------
For Any Queries please comment, Thank you.

Wednesday, December 2, 2015

Creating graph in Excel Using Automation Variables Simple Example for Beginners Like Me :)

Let's Create a table or you can use customer table or any others But for this example
Am create a Simple table  with only 3 fields.
fields     Name            datatype 
1              No.                code/text
2             Type              Option
3              Value            Integer


As we know  Option  field should be assigned with option string in properties.Just like below
Save the Table as ID: 50000  and Name is as Testtable.

Now Run the table and Insert some test value (i mean enter values) in table for testing


Now create a new CodeUnit for our example
Take following as global variables:

Name DataType     Subtype                                                       Length
xlApp Automation  'Microsoft Excel 15.0 Object Library'.Application
xlbook Automation 'Microsoft Excel 15.0 Object Library'.Workbook
xlsheet Automation 'Microsoft Excel 15.0 Object Library'.Worksheet
xlchart Automation 'Microsoft Excel 15.0 Object Library'.Chart
xlRange Automation 'Microsoft Excel 15.0 Object Library'.Range
Testtable   Record          Test table
value    Integer
CellNo1 Text
CellNo2 Text


In OnRun Trigger() write following code:

CREATE(xlApp,TRUE,TRUE);
xlbook := xlApp.Workbooks.Add(-4167);
{
In the preceding procedure, the Add method includes the attribute -4167. In the Microsoft Excel Visual Basic Help, the Add method as it applies to the Workbooks object takes one Template argument, which is of type VARIANT. The description in the Help says:
If this argument is a constant, the new workbook contains a single sheet of the specified type. Can be one of the following: XlWBATemplate constants: xlWBATChart, xlWBATExcel4IntlMacroSheet, xlWBATExcel4MacroSheet, or xlWBATWorkSheet.
For more information, see Workbooks.Add Method (Excel),  http://go.microsoft.com/fwlink/?LinkId=404331.

}
xlsheet:= xlApp.ActiveSheet;
// you use the ActiveSheet property  to ensure that what is done next affects the active sheet of new workbook.

xlsheet.Name := 'Test excel';

CellNo1 := 'A1';
//excel Cell No's

CellNo2 := 'B1';

IF Testtable.FINDSET THEN

REPEAT

CellNo1 := INCSTR(CellNo1);

xlsheet.Range(CellNo1).Value := FORMAT(Testtable.Type);//taking values of x axis

CellNo2 := INCSTR(CellNo2);

xlsheet.Range(CellNo2).Value := ABS(Testtable.Value);//taking values of Y axis

UNTIL Testtable.NEXT = 0;

xlRange := xlsheet.Range('A2:'+FORMAT(CellNo2));
xlchart := xlbook.Charts.Add;

xlchart.Name := ' Top 10 Customer - Graph';
xlchart.ChartWizard(xlRange,-4101,7,2,1,0,1,'Top 10 Customer');
//-4101 refers to chart type
//7            -The option number for the built-in auto formats
//2              - An integer specifying no of rows or Columns  within the source range that contains category labels.

CategoryLabels
An integer specifying the number of rows or columns within the source range that contains category labels.
1 – There is one row with category labels (the department names).
SeriesLabels
An integer specifying the number of rows or columns within the source range that contains series labels.
0 – There are no series labels in your data.
HasLegend
TRUE to include a legend.
0
Title
VARIANT with the title of the chart.
You pass a string such as ‘Personnel Expenses’.
xlApp.Visible := TRUE;


Save the code unit and Run it 


Thank You.
Keep Visiting.


Undo Receipt with Directed Put-away and Pick for Dynamics NAV By ALEX CHOW

Overview
Undo receipt has become a necessity in some warehouse environments where the staff may not be able to keep up with the paper flow. Strictly speaking, the undo receipt process shouldn’t be necessary because the process in place should be able to accommodate. However, if there is a situation where a department “can’t keep up”, it usually means that something is wrong within that particular department. It may not be the people, it may just be how things are being done or may just lack the manpower.
Nonetheless, while you’re trying to figure out a more efficient way in that particular department; in our case the warehouse, mistakes in receipt will be made. We need to be able to correct the mistakes in the warehouse without causing the other departments (such as accounting) a ton of headaches on reversing.

Undo Receipt
The Undo Receipt functionality is pretty straightforward. Basically, you just bring up the Posted Purchase Receipts and do the undo receipt. In fact, it’s so easy it’s explained in a step by step instruction here: Undo Receipt in Dynamics NAV
Undo Receipt with Directed Pick & Put-away
When you enable the Directed Put-away and Pick (or the full Warehouse Management in Dynamics NAV), it may be a little more complicated.
If you follow the steps on MSDN, you’ll get one of these 2 error messages:
UndoReceipt1
“You cannot undo line xxxxx because warehouse activity lines have already been posted.”
UndoReceipt2
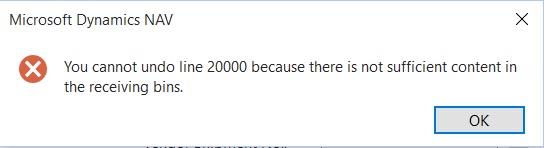
“You cannot undo line xxxxx because there is not sufficient content in the receiving bins.”
One error says you do not have enough on the receiving bin for undo, the other error message says you have a put-away (registered or not) out there.
How Is This Possible?
Right now you may be asking, “how is it possible to register the put-away when it’s physically not there?”
You’re absolutely right. It is impossible to physically put-away something that you didn’t even receive. This is what makes Warehouse Management in Dynamics NAV work; it’s the accuracy of data entry from the actions performed in the warehouse. In real time!
The real problem here is the process within the warehouse receiving department. If the procedures are followed, you should never have to undo. We have to dig deeper on why the warehouse receiving staff are not following the rules for unloading the truck and putting the stuff away. Sometimes there are legitimate reasons why the procedures cannot be followed. In those cases, a new process needs to be thought out to better accommodate the receiving staff.
Resolving issues like this may take a while and this is where we spend time with the client. Often times, I wish it was as easy as just telling the warehouse people to just follow directions.
But I digress…
Undo Receipt After the Put-away is Registered
Here are the steps that need to be done in order to undo receipt after the put-away is registered.
Delete the Registered Pick:
1. Locate the Posted Purch. Receipt
2. Click on Navigate
3. Show the Posted Whse. Receipt Line
4. Click on Navigate –> Show Posted Whse. Document
5. Click on Navigate –> Registered Put-away lines
6. Click on Navigate –> Show Registered Document
7. Push Delete
Adjust the items into the Receipt Bin. In this case, our receipt bin is R:
1. Warehouse Item Journal
2. Negative adjust the item from the bin you want to take out
3. Positive adjust the quantity to the R bin
Do the undo Receipt:
1. Locate the Posted Purch. Receipt
2. Click on the line that you want to undo receipt
3. Click on Function –> Undo Receipt
Conclusion
This is just to get by until you can get to the bottom of why the receiving staff are having trouble with receiving. That’s where the real problem and the solution lies.

NOTE: Just want to say readers that i would link up the Top Bloggers and Blog post to Beginners Requirements .

server was not found at //Server:7046/DynamicsNAV90/Service


Now lets check for if your service is running or not from services window
that is in RUN window type services.msc and click OK 

You can your service running if not right click and start the service.
now check again ...RTC


for running service you can also use the Administration Tool for 2013 and 2015 , 2016 NAV versions